Published January 20, 2021
For over a year now I have been on a huge nail journey. Having had acrylic nails consistently for around 3 years on top of being a horrible nail biter before then, my nails have well and truly suffered over the years.
With lockdowns meaning I had nowhere to get my nails done I turned into a self trained nail tech and I am really quite proud of my nail journey. I’ve picked up some tips and have firmly secured my favourite nail products so I bring you my step by step how to for beautiful natural nails.
Follow these steps for the perfect natural nails:
Step 1: Trim and File.
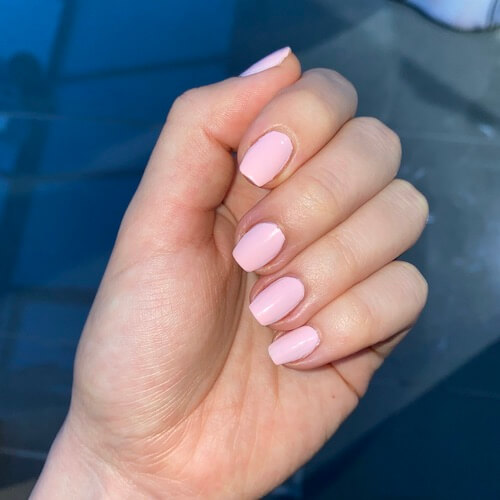
There are so many different shapes you can opt for when trimming and filing your nails. My nails naturally want to follow a square shape so I just file the edges a little to make a coffin shape and I’m good to go. You should aim to trim or at least file your nails weekly to avoid breakage. When filing make sure go bit by bit so you don’t take too much off. If you have strong nails you are very lucky, getting my nails strong and thick has taken me well over a year but with a bit of consistency, I’m now so happy with them and I like to leave a bit of length–but that is totally up to preference.
If you do a lot of washing up ( invest in rubber gloves as washing up liquid is extremely drying for your hands and nails) or a job which may cause your nails to catch or snap, then keep them short. After trimming them with nail scissors or nail clippers make sure you file, even if it's just a little as this will help to smooth the ends and make it much less likely for your nails to get caught on things and ultimately break.
Step 2: Cuticles.
Cuticles are the little thing bits of skin at the bottom of your nail bed that come out slightly onto the nail. To help your nail growth you should be pushing these down regularly and trimming any excess. I like to use nail clippers for this as it means I never go too close to the skin. I’ve only just started this step as I never knew what cuticles even were before last year! Take your time here if you are a beginner and be very careful not to cut any finger skin around the nail as this will cause peeling and could potentially lead to infections.
Step 3: Hand exfoliator (and optional hand mask).
I never miss this step. It’s important to remember that as you age, it’s not just the skin on your face that starts to show wrinkles and marks. Your neck, decollete, and hands also are some of the first places to age even more so than your face as we rarely pay attention to those areas. By using a hand exfoliator weekly you are helping your skin the regeneration and production of skin cells which will keep your hands look younger for longer. I like to exfoliate my face, neck and hands all at the same time and I do this once a week maximum! Over exfoliating any area of your skin can cause more issues so be careful.
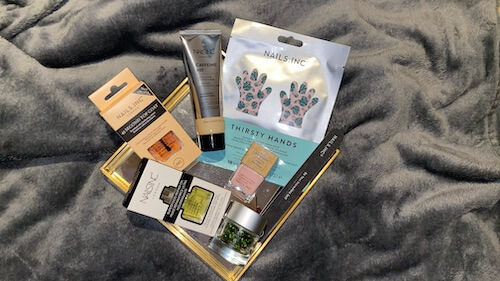
The next part of this step is completely optional but definitely helps especially if you have dry hands. A hand mask is a great way to encourage moisture back to the skin. I use the Nails Inc hand mask as it allows me to scroll through my phone whilst I’m waiting for it to do its magic. But if you’re not a fan of sitting and waiting for the mask to do it’s stuff then you can also just use a thick moisturizer after you exfoliate to get the same effect.
Step 4: Base Coat.
This step is crucial to protect your nail bed from some of the chemicals in nail varnishes. If you are using bright or dark colours they can cause discoloration on the nails and cause the nails to appear yellowish. Using a base coat often helps the nail varnish to last longer too! My favourite base coat is the Kale one by Nails inc.
Step 5: Colour.
Next just pick your favourite nail polish. There are so many options out there but not all of them have a long lasting effect. I always apply two coats of polish leaving 1 minute between each coat to help it dry faster at the end. My top 3 brands for long lasting nail colour and those which don’t end up going that horrible stickiness after a year are:
A top tip to help the nail colour not to chip is to brush the nail polish onto the tip of the nail to seal the polish.
Step 6: Top Coat.
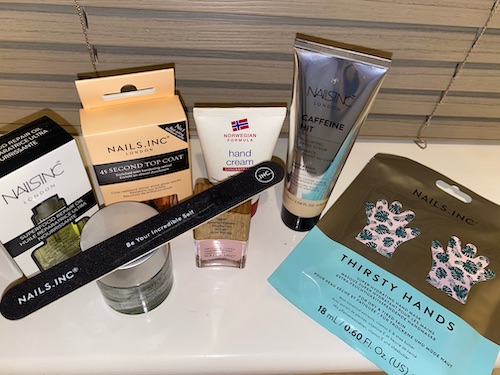
Top coats help to protect the colour, give a smooth and shiny (or matte) finish, and also provide added protection from chipping. The best top coat that I have found has got to be the 45 second by Nails Inc. It dries nearly instantly so you can get on with your day and also leaves a flawless finish to any nail polish. It even removes any lumps and bumps you may have created during the painting process.
Step 7: Dry.
You can invest in nail drying machines for this if you are impatient but I don't really think they help too much. The key is just to have patience and don't do anything that could touch the nails for at least half an hour after painting. If you are painting them before bed don't make the mistake of falling asleep before the polish is completely dry or you will wake up with a lovely 3D print of your bedding fabric or hair in your polish. You can also run your nails under warm water and let them air dry and this helps with the drying process (just do not towel dry them!).
Step 8: Nail Oil.
This step is what gives the whole thing a beautiful nail salon finish. Especially if you have been touching your cuticles you should make the investment into a decent nail and cuticle oil. I use the Nails inc oil and capsules.
Step 9: Moisturiser.
This is just personal preference but I like to finish the whole process with a nice hand moisturiser.
Shop Nails Inc discount codes now to get all of the products mentioned in this blog at the best price.
.png)
Anna Taylor - VoucherShares.co.uk
More blogs from Anna:
Veganuary Beauty - Top Vegan Beauty Brands
New Year, New You, New Lockdown - look after yourself
Merry Christmas! Last minute Christmas arrangements
Don’t miss last Christmas orders delivery dates - ending soon!
Best Christmas Family Games to choose from
More from Voucher Shares Community Blog


.png)


